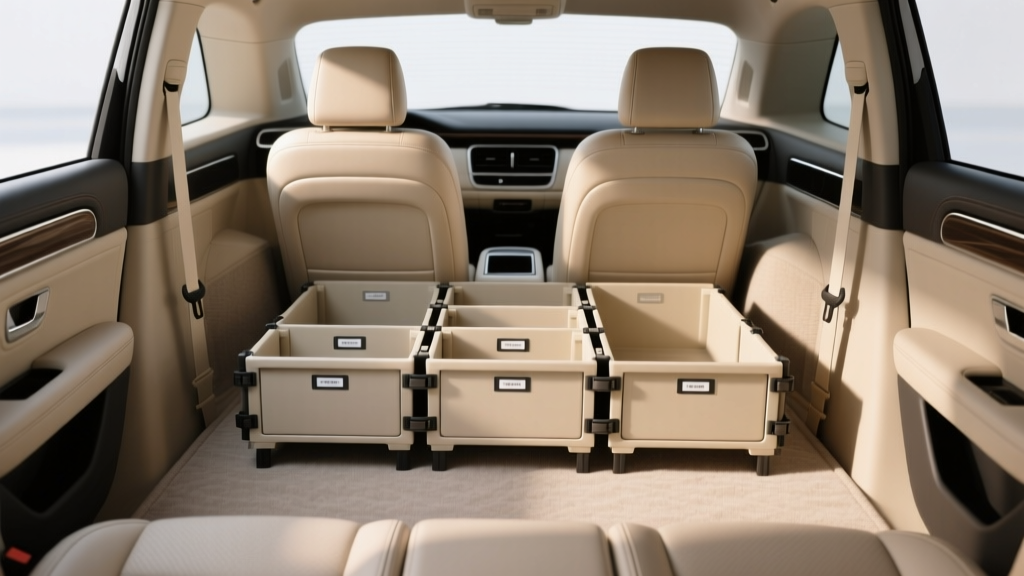
Trunk Divider Installation: Easy Guide for Beginners (2026)
A messy trunk doesn?t just look bad?it wastes time, makes groceries tip over, and can turn a routine drive into a safety issue when loose items slide around. A trunk divider is one of the simplest interior upgrades you can make to keep cargo separated, prevent shifting, and protect your vehicle?s trim from scuffs and spills.
If you?ve been considering a trunk organizer, cargo net, or full cargo management system, a divider often delivers the best balance of price, usefulness, and clean OEM-style results. This handbook breaks down the main trunk divider types, how to choose the right one for your vehicle, and exactly how to install it?even if you?ve never worked on car interior accessories before.
By the end, you?ll know what tools to grab, where beginners tend to go wrong, and how to get a tight, rattle-free fit that holds up to daily driving.
What a Trunk Divider Does (and Why You?ll Actually Use It)
A trunk divider is a physical barrier or adjustable panel that splits your cargo area into sections. Depending on the style, it may attach to factory tie-down points, press against the trunk walls, clip into rails, or strap to anchor loops.
Everyday problems a trunk divider solves
- Groceries falling over: Separate bags from heavy items like cases of water.
- Sports gear chaos: Keep muddy cleats away from clean items.
- Work and tools: Stop toolboxes from sliding into fragile cargo.
- Pet and kid gear: Divide strollers, diaper bags, and emergency kits for quick access.
- Emergency preparedness: Keep your roadside kit from disappearing under everything else.
Safety and interior protection benefits
- Reduces cargo shift that can damage interior panels, carpet, and trunk trim
- Helps keep heavier objects from sliding forward under hard braking
- Makes it easier to pack weight evenly, improving stability
Trunk Divider Types: Which One Fits Your Vehicle and Lifestyle?
Not all dividers install the same way. Before you buy anything, match the divider style to how your trunk is shaped and how you use it.
1) Adjustable tension-bar dividers
These use a bar that expands to press against the trunk walls (sometimes with rubber pads) and often includes a net or panel.
- Best for: Sedans and SUVs with sturdy side panels and a fairly rectangular cargo area
- Pros: Usually tool-free, quick to reposition
- Cons: Can slip if side panels are soft or angled; may leave marks if overtightened
2) Hook-and-loop (Velcro) dividers
These attach to carpeted trunk floors and sides using heavy-duty hook-and-loop strips.
- Best for: Carpeted trunks, light-to-moderate cargo separation
- Pros: Flexible layouts, simple install, budget-friendly
- Cons: Less secure for heavy items; adhesive Velcro can fail in heat
3) Strap-mounted dividers and nets (using tie-downs)
These clip to factory cargo hooks, D-rings, or tie-down loops, forming a barrier net or panel.
- Best for: SUVs, wagons, hatchbacks with factory anchor points
- Pros: Stable, adjustable, easy removal for large loads
- Cons: Needs compatible anchor locations; cheap clips can rattle
4) Rail-based cargo management systems
Some vehicles have rails or tracks; aftermarket kits may add them. Dividers slide and lock into position.
- Best for: Drivers who want a clean, OEM-style setup and frequently reconfigure cargo
- Pros: Most secure and refined; great adjustability
- Cons: Higher cost; installation may involve drilling or hardware
5) Rigid panels or custom-fit dividers
These are shaped or sized to a specific vehicle or cargo area, sometimes integrating with a trunk organizer.
- Best for: Owners who want a ?set it and forget it? layout
- Pros: Solid feel, less movement
- Cons: Less flexible; may reduce usable space for odd-shaped items
Before You Start: Fitment Checks and Tools
Measure and confirm fit (5 minutes that saves returns)
- Measure trunk width: Side-to-side at the point you want the divider installed.
- Measure depth: Front-to-back so you know where the divider won?t block access to spare tire compartments or underfloor storage.
- Check anchor points: Locate D-rings, cargo hooks, seatback anchors, or rails.
- Inspect surfaces: Carpeted sides support Velcro; plastic panels may require strap or rail systems.
- Consider seatback angle: On some SUVs/hatches, the seatback angle reduces effective space near the top.
Beginner-friendly tool list
- Microfiber towel (for cleaning surfaces)
- Isopropyl alcohol (for adhesive/Velcro prep)
- Measuring tape
- Trim tool or plastic pry tool (helpful if routing straps around panels)
- Scissors (for trimming Velcro or strap tails)
- Optional: torque driver or socket set (for rail-based kits)
Step-by-Step Trunk Divider Installation (By Style)
Below are practical installation steps for the most common trunk divider setups. Follow the section that matches your product.
Option A: Installing a tension-bar trunk divider
- Clean the contact points: Wipe trunk side panels where the bar pads will press. Dirt reduces grip and causes slipping.
- Set the divider location: Pick a spot that doesn?t interfere with trunk hinges, the latch area, or a subwoofer enclosure.
- Adjust length loosely: Expand the bar until it?s just slightly longer than the trunk width.
- Position level: Hold it straight across. A crooked bar is more likely to walk loose over time.
- Apply tension gradually: Tighten until snug, then test by pushing down and pulling. Stop before you flex interior panels.
- Load test: Place a heavier item (like a full grocery bag) against the divider and drive around the block. Re-tighten if needed.
Practical tip: If your trunk walls are textured plastic and the bar slips, add thin rubber pads (non-slip shelf liner works well) between the bar ends and the panels.
Option B: Installing a Velcro-based trunk divider on carpet
- Vacuum the area: Velcro hooks grab best when carpet isn?t packed with grit.
- Dry-fit the divider: Place it where you want it and confirm you can still access underfloor storage if needed.
- Prep adhesive (if included): Clean the carpeted contact area lightly with isopropyl alcohol and let it dry.
- Press and hold: Apply firm pressure for 30?60 seconds on each contact point.
- Wait time: If the kit uses adhesive-backed Velcro, give it time to cure?ideally a few hours before heavy use.
- Reinforce corners: If your divider has flexible edges, add extra hook-and-loop squares at the corners to reduce peeling.
Real-world example: If you regularly carry groceries and a gym bag, set a narrow ?upright? section near the trunk opening for grocery bags, and a wider section deeper in the trunk for duffels and bulk items.
Option C: Installing a strap-mounted divider or cargo net using tie-down points
- Locate anchors: Identify the factory cargo hooks/D-rings. Most SUVs have four corners; sedans may have fewer.
- Attach lower clips first: Start at the bottom so the net/panel hangs naturally and you can center it.
- Attach upper points: Connect top straps to higher anchors (seatback anchors, rail points, or upper rings if available).
- Center and tension: Tighten straps evenly. Over-tightening can deform trim panels or pull anchors at odd angles.
- Secure strap tails: Roll and tuck excess strap to prevent rattles and snagging.
- Test with mixed cargo: Put a rigid item (small cooler) on one side and softer items on the other to see if the divider holds its shape.
Practical tip: If the clips squeak, add a small piece of felt tape where clip hardware touches interior plastic.
Option D: Installing a rail-based trunk divider system
Rail kits vary by vehicle, so always follow the included instructions. These general steps keep beginners out of trouble.
- Confirm rail placement: Mark where rails will sit and check clearance for underfloor storage, wiring, and spare tire compartments.
- Protect interior surfaces: Use painter?s tape where you?ll rest tools or rails during alignment.
- Install rails: Use the provided hardware. If drilling is required, measure twice and drill once?then vacuum up shavings immediately.
- Mount the divider blocks: Slide in blocks and lock them. Ensure locking mechanisms fully engage.
- Rattle check: Tap rails and divider with your hand. If anything buzzes, re-seat and tighten.
- Load and road test: Start with light cargo, then increase weight once you?re confident everything stays put.
Beginner caution: If drilling is required and you?re unsure what?s beneath the panel, consider having a shop install the rails. Hitting wiring or a fuel vapor line can turn a small project into a big repair.
Choosing the Right Trunk Divider: Quick Comparison
- Best budget pick: Velcro-based divider (great for groceries and everyday organization)
- Best for heavy cargo control: Strap-mounted net/panel with metal clips and strong anchor points
- Best for frequent reconfiguration: Rail-based cargo management system
- Best for renters/lease vehicles: Tension-bar divider or non-adhesive strap system (minimizes permanent marks)
What to look for in product quality
- Hardware: Metal clips and buckles usually last longer than thin plastic.
- Edge finishing: Bound edges and reinforced seams prevent fraying.
- Adjustability: Multiple mounting points and strap length range matter more than fancy branding.
- Noise control: Rubberized ends, padded contact points, or felt tape compatibility help prevent rattles.
Common Mistakes to Avoid (and How to Fix Them)
- Over-tightening a tension bar: Can crack trim or leave permanent marks. Tighten just until it stops slipping, then re-check after a short drive.
- Skipping cleaning before Velcro install: Adhesives fail fast on dusty carpet. Vacuum and prep first.
- Ignoring underfloor access: Placing the divider over the spare tire cover can make emergencies harder. Position it so panels can still open.
- Using weak anchor points: Not all hooks are equal. If a factory hook feels flimsy, reduce tension or move to a stronger point.
- Not securing loose straps: Strap ends can rattle, snag bags, or get caught in trunk hinges. Roll and tuck them.
- Assuming ?universal fit? means perfect fit: Universal products often require adjusting expectations and placement. Measure first and plan around trunk contours.
Pro Tips for a Clean, OEM-Like Result
- Match the divider to your interior: Black or charcoal fabrics hide scuffs and blend with most trunk liners.
- Create zones: Keep an ?always-ready? zone for an emergency kit and tire inflator, and a ?daily use? zone for groceries or backpacks.
- Use a trunk liner underneath: A rubber trunk mat improves grip and makes cleanup easier if something spills.
- Prevent odor transfer: If you carry sports gear or pet items, use a washable tote on one side of the divider.
- Seasonal setup: Winter: add a bin for washer fluid and scraper. Summer: dedicate a spot for sunscreen, towels, or a small cooler.
FAQ: Trunk Divider Installation and Use
Do trunk dividers work in sedans as well as SUVs?
Yes. Sedans often benefit from a simple Velcro divider or tension-bar setup because the trunk is enclosed and items can slide far from reach. SUVs and hatchbacks typically do well with strap-mounted dividers and nets due to accessible anchor points.
Will a trunk divider damage my interior panels?
It shouldn?t if installed correctly. Problems usually come from over-tightened tension bars, rough metal clips rubbing trim, or adhesive pulled off carpet fibers. Use padding where parts contact plastic, and don?t force a divider into a shape your trunk doesn?t support.
What?s better: a trunk divider or a trunk organizer bin?
They solve slightly different problems. A divider creates sections and prevents shifting across the cargo area. An organizer bin groups smaller items into compartments. Many owners use both: a divider to create zones, and a small bin for tools, cleaning supplies, or first-aid gear.
How do I stop a divider from rattling?
Start by re-tensioning and ensuring all clips are fully seated. Then add felt tape or thin foam where hardware touches plastic. Also secure loose strap tails?many ?mystery rattles? are just strap ends tapping the trim over bumps.
Can I install a rail-based cargo system myself?
If it?s a no-drill kit that uses existing mounting points, a careful DIY install is realistic. If drilling is required, you?ll want to be confident about what?s under the mounting surface and comfortable measuring and aligning hardware. When in doubt, have a shop do the rail install and then handle the divider setup yourself.
Wrap-Up: Your Next Steps
Start by deciding what you?re trying to fix?rolling groceries, sliding tools, messy sports gear, or all of the above. Measure your trunk, identify anchor points, and choose a trunk divider style that matches your interior surfaces and cargo habits. Then follow the installation steps for your divider type, do a quick road test, and fine-tune tension so it?s secure without stressing trim.
If you want the fastest win, pair a divider with a non-slip trunk mat and a small emergency bin. That combo keeps daily clutter under control and makes your cargo area feel purpose-built.
For more practical car interior upgrades, fitment tips, and accessory guides, explore the latest articles on carinteriormix.com.